
Welcome To Local Citation Site

Introduction
Platelet-Rich Plasma (PRP) therapy continues to gain ground as a foundational element in regenerative treatment plans. With its autologous, minimally invasive profile, PRP is widely used to stimulate healing in musculoskeletal injuries, chronic tendon disorders, and early degenerative joint conditions.
Yet for new clinicians or assistants entering the field of regenerative medicine, the PRP procedure can seem complex at first glance. From blood collection to final injection, each step plays a critical role in the efficacy of treatment.
This guide outlines a clear, step-by-step walkthrough of the standard PRP procedure, the role of Tropocells PRP in improving outcomes, and best practices for optimizing preparation and post-treatment protocols.
The PRP procedure involves drawing a patient’s blood, processing it to isolate and concentrate platelets, and then injecting that platelet-rich plasma into the target tissue. The goal is to promote natural healing through the delivery of growth factors, cytokines, and cell signaling molecules concentrated in platelets.
While simple in concept, successful execution requires clinical accuracy, standardized systems, and clear communication with patients.
The first step in the PRP procedure is collecting venous blood from the patient. Depending on the treatment area and desired concentration, typical collection volumes range from 15 to 60 mL.
Best Practices:
Collection should be done aseptically and with minimal tissue trauma to avoid hemolysis, which can reduce platelet quality.
Once the blood is collected, the next step is centrifugation—a process that separates blood into its primary components based on density.
Tropocells PRP offers a closed, dual-chamber tube system that streamlines this process. When placed in a compatible centrifuge, such as the Horizon 6 Flex, the blood is spun at a predetermined speed and time (usually around 1800 RPM for 10 minutes).
The outcome:
Tropocells tubes are designed to enable clean extraction of the PRP layer, with minimal red or white blood cell contamination—reducing inflammation risks post-injection.
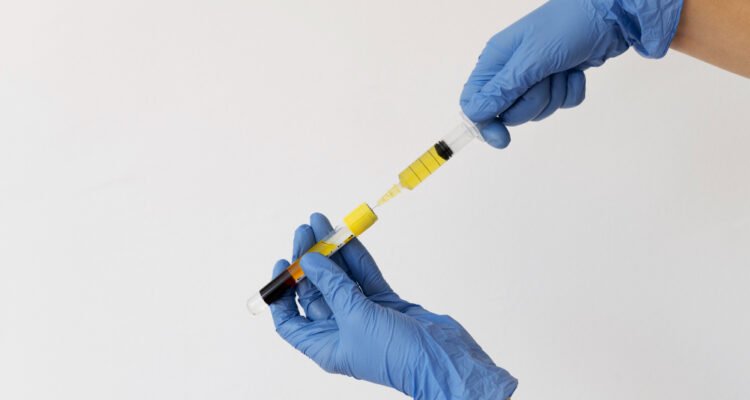
Once centrifugation is complete, the clinician carefully extracts the PRP layer using a syringe or internal separation system provided with the Tropocells kit.
At this point, the PRP is ready for injection, typically within 15–20 minutes of the initial blood draw.
PRP injections are administered directly into the injured or degenerative tissue. For musculoskeletal applications, this may involve intra-articular, intratendinous, or peritendinous injections.
Delivery accuracy is essential. Poorly placed PRP may reduce clinical efficacy or delay healing. Training and experience in needle guidance, anatomy, and ultrasound interpretation are key to success.
Proper post-procedure care is vital to support healing and manage patient expectations.
Many patients report mild soreness or swelling in the first 48 hours, followed by gradual improvement in pain, range of motion, and function over 2–6 weeks.
Repeat treatments may be recommended based on clinical condition and response.
Clinics using Tropocells PRP systems benefit from several practical advantages:
Minimizes contamination risk, especially important in joint and spine injections.
PRP is ready in under 20 minutes from draw to injection—ideal for high-volume clinics.
Consistent platelet concentration and plasma volume across patients, improving treatment reproducibility.
Minimal training required for staff; tubes fit common centrifuge models; color-coded and labeled for clarity.
This ease-of-use allows new regenerative practitioners, physician assistants, and clinical trainers to adopt PRP protocols with confidence and efficiency.
Following a standardized PRP procedure delivers benefits at multiple levels:
Systems like Tropocells help bridge the gap between biologic science and day-to-day clinical application by removing uncertainty and elevating procedural precision.
Most protocols recommend 2–3 injections spaced 2–4 weeks apart, depending on severity and response.
Yes. PRP is often used in conjunction with stem cell therapies, microfat grafting, or physical therapy programs.
Yes. Manual methods carry a higher risk of contamination, inconsistent concentration, and increased preparation time.
A successful PRP procedure is more than just an injection—it’s a structured, multi-step process that relies on precision, consistency, and the right tools. For beginners in regenerative therapy, physician assistants, and clinical trainers, mastering this workflow is essential for building trust with patients and achieving reliable outcomes.
By integrating systems like Tropocells PRP, clinics can optimize platelet concentration, ensure sterility, and streamline preparation—making regenerative medicine more accessible and more effective from day one.
Equip your practice with reliable, easy-to-use regenerative tools. Discover how Tropocells PRP can streamline your PRP procedure and improve clinical outcomes at
—your trusted source for precision-focused PRP and regenerative systems.